
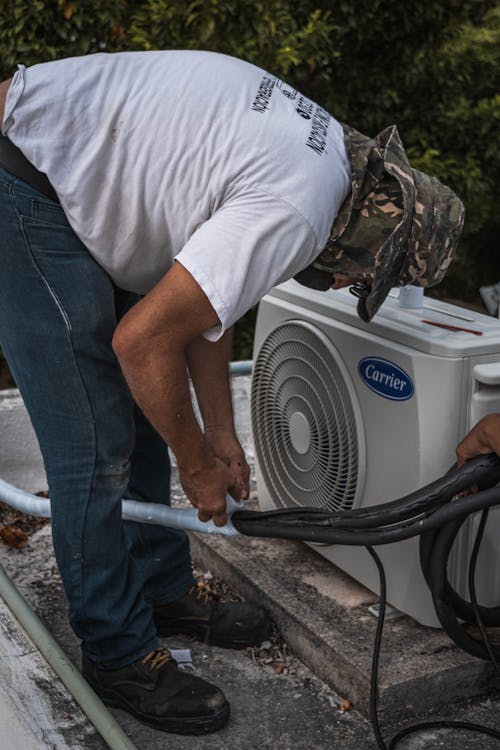
Fall HVAC maintenance isn’t optional in Kansas City. It’s how you keep your furnace from failing on the coldest night of the year. ENERGY STAR reports that heating and cooling accounts for 43 to 48% of home energy use — and in a metro area where January lows regularly drop into single digits, your heating system carries most of that load. The furnace you ignored all summer is about to become the hardest-working appliance in your home.
Here’s the problem. Most homeowners don’t think about their HVAC system until something breaks. The furnace clicks on in October, and if warm air comes out, they assume everything’s fine. But a system that “works” isn’t the same as a system that works efficiently, safely, and cleanly. Dirty ducts recirculate months of accumulated debris. Clogged filters choke airflow. Unsealed ductwork wastes conditioned air. Carbon monoxide detectors with dead batteries don’t detect anything. Each issue is preventable with a fall checklist — and each one gets expensive or dangerous if ignored.
This guide covers nine essential fall HVAC maintenance steps for Kansas City homeowners. Whether you’re in Lee’s Summit, Overland Park, or anywhere across the metro, these steps protect your furnace, your air quality, and your wallet before winter arrives.
TL;DR: Heating and cooling consumes 43-48% of home energy (ENERGY STAR), and Kansas City winters push furnaces to their limits. Nine fall maintenance steps — duct cleaning, filter replacement, vent inspection, thermostat programming, CO detector checks, duct sealing, dryer vent cleaning, register upgrades, and a professional tune-up — prevent breakdowns, reduce energy waste, and keep your indoor air clean all winter.
Step 1: Why Should You Clean Your Air Ducts Before Heating Season?
The EPA reports that indoor pollutant concentrations typically run 2 to 5 times higher than outdoor levels. Your duct system has been collecting dust, pollen, and allergens all summer — and once the furnace kicks on, every particle stored in those ducts circulates through your home. Fall duct cleaning clears that contamination before heating season puts it in the air you breathe.
What Accumulates in Ducts During Spring and Summer
Kansas City’s allergy seasons run hard from March through October. Tree pollen peaks in spring. Grass pollen dominates summer. Ragweed takes over in early fall. Each season deposits a new layer of allergenic material inside your ductwork. Add pet dander, household dust, cooking residue, and the occasional insect, and your ducts are holding eight months of debris by the time October arrives.
Summer humidity makes things worse. When warm, moist air contacts cooler duct surfaces, condensation forms. That moisture plus accumulated organic material creates conditions where mold can establish. You might not see it — ductwork is hidden behind walls and above ceilings — but mold spores in the air supply affect everyone breathing the air. Kansas City’s notorious summer humidity means this isn’t a theoretical risk. It’s a seasonal pattern.
The NADCA (National Air Duct Cleaners Association) recommends professional duct cleaning every 3 to 5 years. But timing matters as much as frequency. Fall — specifically September through early November — is the ideal window. You’re clearing summer’s accumulation before sealing the house for winter. You’re also catching the transition period between cooling and heating, when the HVAC system gets a brief rest and technicians can access ductwork without competing against temperature demands.
In our years of cleaning ducts across the Kansas City metro, we’ve noticed a clear pattern. Homes that schedule fall duct cleaning report fewer furnace cycling issues during winter, better airflow from registers, and noticeably less dust on furniture. One Lee’s Summit homeowner told us she used to wipe her coffee table every morning through the winter. After fall duct cleaning, that daily dusting dropped to once a week. The debris wasn’t coming from outside — it was coming from inside the duct system, recirculated every time the furnace ran.
Why Fall Timing Beats Spring Cleaning
Spring duct cleaning has its place. But fall cleaning addresses a specific problem: you’re about to seal your home and run the furnace for five straight months. Whatever is in the ducts will circulate through every room, repeatedly, with minimal fresh air exchange. The EPA notes that Americans spend approximately 90% of their time indoors. During a Kansas City winter, that number climbs even higher. Windows stay shut. Doors open briefly. Your HVAC system becomes the sole air handler for your entire home.
A professional duct cleaning before heating season means the air your family breathes all winter starts clean. Spring cleaning addresses what built up over heating season. Fall cleaning prevents the buildup from circulating in the first place. Both matter, but if you’re choosing one, choose fall.
Step 2: How Often Should You Change Your Furnace Filter in Fall?
According to ENERGY STAR, heating and cooling accounts for 43 to 48% of home energy use. A clogged furnace filter is one of the fastest ways to push that number higher. Fall is the time to install a fresh filter before the furnace begins its months-long winter run — and to commit to a replacement schedule that keeps airflow unrestricted through spring.
Why the Standard 90-Day Rule Doesn’t Apply in Winter
Filter manufacturers typically recommend replacement every 90 days. That timeline assumes moderate use. Kansas City winters don’t deliver moderate use. From November through March, the furnace runs for extended cycles — sometimes nearly continuously during cold snaps. Every hour of runtime pushes more air through the filter, loading it with particulate faster than summer AC use does.
A 1-inch pleated filter in a Kansas City home during January will often hit capacity in 30 to 45 days. A 4-inch media filter lasts longer — 60 to 90 days — but still needs monitoring during peak heating months. The filter’s job is to protect the blower assembly and evaporator coil while keeping particulate out of the air supply. Once it’s saturated, airflow drops, the blower works harder, and the system’s efficiency degrades. Your energy bill reflects the difference.
Choosing the Right Filter for Heating Season
MERV ratings matter. A MERV 8 filter catches most large particulate — pollen, dust mites, mold spores. A MERV 11 to 13 filter captures finer particles, including pet dander and some bacteria. Don’t go higher than your system supports, though. A MERV 16 filter in a system designed for MERV 8 restricts airflow to the point where the blower motor overworks and the heat exchanger can overheat. Check your furnace manual or ask your HVAC technician for the maximum recommended MERV rating.
For fall, install a fresh filter on the same day you switch from cooling to heating. Write the installation date on the filter frame with a permanent marker. Set a phone reminder for 30 days. When the reminder goes off, pull the filter and hold it up to a light source. If you can’t see light through it, it’s time for a new one. This visual check takes 20 seconds and tells you more than any manufacturer’s timeline.

Step 3: What Should a Fall Vent Inspection Cover?
ENERGY STAR estimates that 20 to 30% of conditioned air is lost through duct leaks in typical homes. A fall vent inspection catches the physical damage, blockages, and airflow problems that waste heated air before it reaches your living spaces. Walk every room. Look at every register. This 30-minute inspection can reveal problems that cost hundreds in wasted energy if left until spring.
Supply Register Walkthrough
Start with the supply registers — the vents that deliver heated air to each room. Open every one. It sounds obvious, but partially closed or fully shut registers in guest rooms, basements, or unused bedrooms are one of the most common airflow problems in residential HVAC. Some homeowners close registers to “save energy” in unused rooms. This actually increases pressure in the duct system, worsens duct leakage, and forces the furnace to work harder.
Check each register for physical damage. Bent louvers restrict airflow. Rust on metal registers indicates moisture contact. Cracked plastic registers lose directional control. If your registers are old, damaged, or discolored, fall is the time to replace them. Fresh replacement registers deliver better airflow and a cleaner look. It’s a small upgrade that makes a noticeable difference in both comfort and appearance.
While you’re at each register, hold a tissue in front of it and turn the furnace on. The tissue should flutter consistently from every supply vent. If one room has weak airflow while others blow strong, that duct run might be disconnected, crushed, or blocked. Flag it for a professional inspection.
Return Vent Check
Return vents pull air back to the furnace for reconditioning. They’re typically larger than supply registers and are often located in hallways, stairwells, or central rooms. Check that nothing is blocking them — no furniture pushed against them, no rugs draped over them, no storage boxes stacked in front. A blocked return starves the furnace of air, reduces efficiency, and can cause the heat exchanger to overheat.
Look at the return grille itself. If it’s coated in dust, that dust is entering the duct system every time the furnace runs. Vacuum the grille with a brush attachment. While the grille is accessible, peek inside the return duct opening. If you see a thick layer of dust, debris, or discoloration on the duct walls, it’s time for professional duct cleaning.
Step 4: How Should You Program Your Thermostat for Fall and Winter?
Heating and cooling accounts for 43 to 48% of home energy use (ENERGY STAR). Your thermostat is the control center for all of it. Programming it correctly for fall and winter doesn’t just affect comfort — it directly controls how hard your furnace works, how much energy it consumes, and how evenly your home heats. A few minutes of setup in October can lower your energy bills from November through March.
Setting a Winter Schedule
The Department of Energy recommends setting your thermostat to 68 degrees when you’re home and awake, then dropping it 7 to 10 degrees during sleeping hours and when the house is empty. In Kansas City, where outdoor temperatures can swing 30 degrees in a single day during fall, a programmable or smart thermostat handles these adjustments automatically.
If you still have a manual thermostat, fall is the time to upgrade. But even a basic programmable model works. Set four periods: morning wake-up, daytime (away or home), evening, and overnight. The furnace ramps down when you don’t need peak comfort and ramps up before you wake or arrive home. The savings compound over five months of heating season.
Most thermostat advice focuses on the setpoint — what temperature you choose. But the ramp time matters just as much in Kansas City’s climate. If you set the thermostat to raise the temperature from 62 to 68 degrees at 6:00 AM, and it’s 5 degrees outside, the furnace might need 45 minutes to bring the house up to temp. That means you’re waking up cold at 6:00 and comfortable by 6:45. Move the ramp-up to 5:15 AM, and you wake up warm. Smart thermostats learn this automatically. Programmable ones need you to think through the timing based on how long your home takes to recover from setback temperatures in cold weather.
Fall-Specific Settings
Kansas City’s fall weather is unpredictable. October can bring 80-degree afternoons and 40-degree nights in the same week. If your system has auto-changeover (switching between heating and cooling based on demand), make sure there’s a dead band of at least 3 degrees between your heating and cooling setpoints. Without that gap, the system might cool in the afternoon and heat that same evening, cycling between modes inefficiently.
If your system doesn’t have auto-changeover, make the switch from cooling to heating manually when nighttime lows consistently drop below 55 degrees. In the Kansas City metro, that usually happens in mid to late October. Don’t leave the AC running when overnight temperatures require heat. The system isn’t designed to alternate modes rapidly, and the unnecessary cycling wears components faster.

Step 5: Why Is a Carbon Monoxide Detector Check Critical Before Heating Season?
The EPA reports indoor pollutant concentrations run 2 to 5 times higher than outdoor levels, but carbon monoxide is the indoor pollutant that kills without warning. CO is colorless and odorless. A cracked heat exchanger or a blocked exhaust flue can fill your home with it, and you won’t smell, see, or taste anything wrong. Your CO detectors are the only line of defense — and they only work if you check them before heating season starts.
Testing and Replacing CO Detectors
Press the test button on every CO detector in the house. If it chirps, the electronics work. But that test only checks the alarm circuit, not the sensor. CO sensors degrade over time. Most manufacturers recommend replacing the entire unit every 5 to 7 years. Check the manufacture date on the back of each detector. If it’s older than 7 years, replace it. Don’t gamble on a sensor that’s past its rated lifespan.
Install CO detectors on every level of your home, outside each sleeping area, and near the furnace. Battery-powered units need fresh batteries at least annually — fall is the natural time to swap them. Hardwired units with battery backup need the backup batteries replaced on the same schedule. A CO detector with a dead battery is just a plastic disc on the wall.
What Triggers CO in a Home Heating System
The most dangerous source of residential carbon monoxide is a cracked heat exchanger inside the furnace. The heat exchanger separates the combustion chamber (where gas burns) from the air supply (which your family breathes). A crack allows combustion gases — including CO — to leak into the airstream. From there, the blower pushes CO-contaminated air through every duct in the house and into every room.
Heat exchangers crack from thermal stress: years of expanding when hot and contracting when cool. Older furnaces are more susceptible, but even newer units can develop cracks if airflow is restricted by dirty filters, blocked returns, or closed registers. This is another reason fall HVAC maintenance matters. Changing the filter, opening all registers, and scheduling a professional inspection all reduce the conditions that stress the heat exchanger.
Other CO sources include blocked exhaust flues (bird nests, debris, ice dams), malfunctioning water heaters, and attached-garage vehicles. But the furnace is the highest-volume combustion appliance in most Kansas City homes, and it runs the most hours during winter. Make sure your CO detectors are functional before you ask the furnace to run 16 hours a day for five months straight.
Step 6: How Much Energy Do Leaky Ducts Waste in Winter?
ENERGY STAR puts it plainly: 20 to 30% of conditioned air is lost through duct leaks in a typical home. In winter, that’s heated air — air your furnace burned gas to warm — escaping into attics, crawlspaces, and wall cavities where it does nothing for anyone. Sealing those leaks before heating season is one of the highest-return energy investments a homeowner can make.
Where Duct Leaks Occur
Duct joints are the primary leak points. Where two duct sections meet, where branch lines connect to the main trunk, and where ducts attach to the air handler — these connections loosen over time. Duct tape (despite the name) is not a permanent duct sealant. It dries out and peels away, sometimes within a few years. Homes with older ductwork often have dozens of joints where the original tape has failed.
Boot connections — where the duct meets the register box in the floor, wall, or ceiling — are another common leak point. If you can feel warm air escaping around a register opening rather than coming through the louvers, the boot connection is leaking. This is heated air warming the inside of a wall cavity instead of warming the room. It’s invisible waste that shows up on every gas bill from November through March.
Professionally sealed ducts use mastic sealant or UL-listed metal foil tape on every joint and connection. Mastic is a thick, paintable adhesive that doesn’t dry out or peel. It creates a permanent seal that outlasts the duct system itself. If your ducts have never been sealed — or if they were sealed with standard cloth duct tape years ago — fall is the time to address it.
The Connection Between Duct Leaks and Indoor Air Quality
Duct leaks don’t just waste energy. They contaminate your air supply. Return-side leaks pull unfiltered air from attics, crawlspaces, and wall cavities into the duct system. That air bypasses the furnace filter entirely. It carries insulation fibers, rodent droppings, dust, and whatever else lives in your home’s unconditioned spaces. The EPA identifies duct leaks as a contributor to the indoor pollutant concentrations that run 2 to 5 times higher than outdoor levels.
Most homeowners think about duct leaks as an energy problem. They are. But they’re also an air quality problem that gets worse in winter. During summer, your attic might reach 130 degrees. Hot attic air pulled through a return leak is uncomfortable but relatively low in contaminants. During winter, that same attic sits near outdoor temperature and may contain moisture, mold growth on roof sheathing, and rodent activity. The air a winter duct leak pulls into your system is often dirtier, more humid, and more biologically active than the air a summer leak introduces. Sealing ducts before heating season addresses both the energy loss and the air quality contamination — but the air quality argument is the one most people never hear.

Step 7: Why Does Fall HVAC Maintenance Include Dryer Vent Cleaning?
Dryer vent cleaning isn’t always grouped with fall HVAC maintenance, but it should be. Your dryer vent exhausts moist, lint-laden air out of the house. When that vent is restricted, the dryer works harder, takes longer to dry clothes, and creates a fire risk. Fall is when dryer use increases — heavier clothes, more loads, blankets coming out of storage. A clean dryer vent heading into winter means safer, more efficient operation during the months you use it most.
The Lint Buildup Problem
The lint trap catches most visible lint. But fine particles slip past and accumulate inside the vent pipe and at the exterior exhaust termination. Over 12 to 24 months, this buildup restricts airflow enough to extend drying times, overheat the dryer, and create a combustible mass inside the vent pipe. The risk is real. Residential dryer fires cause injuries, deaths, and millions in property damage every year in the United States.
Kansas City homes often have dryer vents that run 15 to 25 feet or more, with multiple elbows, through interior walls and up through the roof. Longer runs with more turns accumulate lint faster and are harder to clean without professional equipment. A vent that exits through a sidewall at ground level is easier to maintain. A vent that runs vertically through the roof traps lint at every bend.
Fall dryer vent cleaning pairs naturally with duct cleaning. Both services address air pathways in your home. Both prevent problems that worsen during winter. And both can often be scheduled on the same service visit, saving time and typically reducing the combined cost. Check our dryer vent cleaning page for details on what the service includes.
Step 8: Should You Replace Your Registers Before Winter?
Registers are the final delivery point for every dollar of heated air your furnace produces. Damaged, rusted, or paint-clogged registers restrict that airflow and send it in the wrong direction. Replacing worn registers is one of the simplest fall HVAC maintenance steps — and one of the most overlooked. It takes minutes per vent, costs little per register, and makes a visible difference in both airflow and appearance.
Signs Your Registers Need Replacement
Rust is the most obvious sign. Metal registers in older Lee’s Summit and Overland Park homes develop rust along the louver edges and frame, especially in bathrooms and kitchens where humidity is higher. Rust weakens the louver mechanism, prevents proper airflow direction, and flakes particles into the air supply. If a register crumbles when you remove it, it’s years past replacement.
Bent or missing louvers are another indicator. Louvers direct heated air into the room at the proper angle. When they’re bent, air blows straight down into the floor or straight up at the ceiling instead of fanning into the living space. Some registers have been painted so many times that the louvers are permanently stuck in one position. Others have been stepped on, kicked, or otherwise damaged. A fresh register with functioning louvers delivers air where it’s supposed to go.
Old registers can also leave gaps around the duct opening. If the register doesn’t sit flush against the floor, wall, or ceiling, heated air escapes around the edges into the wall cavity. That gap wastes energy and allows unfiltered air to enter living spaces. New registers with proper sizing and gaskets eliminate this loss. See our options for Lee’s Summit register replacement and Overland Park register replacement.
We’ve replaced registers in hundreds of Kansas City metro homes, and the reaction is almost always the same: homeowners are surprised by how much better the new ones look and perform. One Overland Park family had original registers from a 1985 build — 40 years of paint layers, pet hair packed behind the louvers, and rust along every edge. We replaced all 14 registers during a duct cleaning visit. The homeowner said it was the first time she could actually feel warm air reaching the far side of the living room. The old registers had been choking airflow so gradually that nobody noticed until the restriction was removed.
Step 9: What Does a Professional Fall HVAC Tune-Up Include?
With heating and cooling consuming 43 to 48% of home energy (ENERGY STAR), a professional furnace tune-up before winter protects both your equipment and your budget. A qualified technician inspects, cleans, and tests components that homeowners can’t safely access — including the heat exchanger, burner assembly, ignition system, and gas connections. This annual check catches small problems before they become midwinter emergencies.
What the Technician Inspects
A thorough fall tune-up covers the combustion side and the air side of the furnace. On the combustion side, the technician checks the heat exchanger for cracks (the CO risk discussed in Step 5), inspects the burners for even flame pattern, tests the ignition system, verifies gas pressure, and checks the exhaust flue for blockages. On the air side, they inspect the blower motor, check the blower wheel for debris, verify the capacitor and electrical connections, and test the thermostat’s calibration.
The inspection should also include measuring static pressure — the resistance the blower works against to push air through the duct system. High static pressure indicates restricted airflow from dirty filters, blocked ducts, or undersized ductwork. A system running at high static pressure consumes more energy, creates more noise, and wears out the blower motor faster. Fall is the time to identify and correct these issues, not January when the furnace has been straining for three months.
DIY Steps vs. Professional Steps
Some fall maintenance tasks are homeowner territory. Changing the filter, opening registers, testing CO detectors, programming the thermostat, checking the exterior exhaust termination for blockages — all of these are safe and straightforward. Do them yourself.
Other tasks require professional tools and training. Inspecting the heat exchanger, testing gas pressure, measuring combustion efficiency, evaluating the electrical components, and cleaning the burner assembly — these aren’t YouTube projects. Natural gas systems involve combustion, carbon monoxide, and electrical components. A mistake can be dangerous. Schedule a professional tune-up annually, ideally in September or October before HVAC companies hit their winter emergency rush.
Across our service area in Lee’s Summit, Overland Park, and the broader Kansas City metro, we consistently see that homes combining fall duct cleaning with a professional furnace tune-up experience fewer midwinter service calls. The logic is straightforward: clean ducts reduce airflow restriction, which reduces stress on the blower motor and heat exchanger. A tuned furnace runs at peak combustion efficiency with verified gas pressure and clean burners. Together, you’re starting winter with a system that’s clean inside and mechanically sound — the two factors most responsible for reliable, efficient operation through March.

Why Does Kansas City’s Climate Make Fall HVAC Maintenance Especially Important?
The EPA reports that Americans spend approximately 90% of their time indoors. During a Kansas City winter, when temperatures hover near or below freezing for weeks, indoor time increases even further. Your HVAC system doesn’t get a break from November through March. Fall maintenance ensures it’s ready for that sustained demand — because Kansas City’s climate doesn’t forgive systems that start winter in poor condition.
Temperature Swings and System Stress
Kansas City’s fall weather is uniquely demanding on HVAC systems. October can deliver a 75-degree afternoon followed by a 35-degree overnight low. That 40-degree swing means your system might cool the house at 3:00 PM and heat it at 3:00 AM. By November, the swings narrow but the direction is clear: down. December through February brings sustained cold, with January averaging highs near 35 degrees and lows near 18. Cold snaps push well below zero.
This pattern stresses HVAC components in ways that mild climates don’t. The heat exchanger expands and contracts with every cycle. The blower motor runs for extended periods. Gas valves open and close hundreds of times per week. Ductwork in unconditioned attics and crawlspaces contracts in the cold, opening gaps at joints that were tight in summer. Every step in the fall maintenance checklist addresses one of these stress points.
Sealed Homes and Indoor Air Quality
Kansas City homeowners seal their homes tight for winter. Storm windows go up. Weatherstripping gets replaced. Doors stay closed. That’s smart for energy efficiency but problematic for air quality. A tightly sealed home has minimal natural air exchange with the outdoors. Whatever is in the indoor air — dust, pet dander, cooking particles, VOCs from cleaning products — stays in the indoor air. The HVAC system recirculates it through the duct system, through the filter, and back into your rooms, over and over.
The EPA reports indoor pollutant concentrations run 2 to 5 times higher than outdoor levels under normal conditions. In a sealed winter home with dirty ductwork, a clogged filter, and no fresh air exchange, those concentrations climb even higher. Fall HVAC maintenance — especially duct cleaning and filter replacement — directly reduces the pollutant load that builds inside a sealed winter home.
This is the connection most KC homeowners miss. They think of fall HVAC maintenance as equipment protection. It is. But it’s also air quality protection. Your family will breathe the air that passes through your duct system thousands of times between November and March. Cleaning those ducts and replacing that filter before winter isn’t just about the furnace. It’s about the air.
What’s the Complete Fall HVAC Maintenance Checklist?
With heating and cooling consuming 43 to 48% of home energy use (ENERGY STAR), a structured fall checklist turns good intentions into actual savings. Here’s every step from this guide, organized for action. Print it, tape it to the furnace, and work through it before November.
DIY Steps (Do These Yourself)
Furnace filter: Install a fresh filter rated at the highest MERV your system supports. Write the date on the frame. Set a 30-day reminder. Check and replace monthly through March.
Vent inspection: Walk every room. Open all supply registers. Clear obstructions from all return vents. Test airflow with a tissue at each supply vent. Flag weak-flow rooms for professional inspection.
Thermostat: Program or adjust your winter schedule. Set 68 degrees when home and awake, 60-62 degrees for sleeping and away periods. Adjust ramp-up times so the house is warm when you need it. Replace batteries in battery-powered thermostats.
CO detectors: Test every unit. Replace batteries. Check manufacture dates and replace any unit older than 7 years. Verify placement on every level, near bedrooms, and near the furnace.
Exterior check: Inspect the furnace exhaust flue outside. Remove any bird nests, debris, or obstructions. Clear vegetation and stored items away from the outdoor AC unit. Ensure the gas meter area is accessible.
Professional Steps (Schedule These)
Duct cleaning: Schedule professional air duct cleaning to remove spring and summer accumulation before heating season. Ideal timing: September through early November.
Dryer vent cleaning: Schedule professional dryer vent cleaning to clear lint buildup before winter’s heavy dryer use. Pair with duct cleaning for efficiency.
Register replacement: Replace rusted, damaged, or paint-clogged registers for better airflow and appearance.
Furnace tune-up: Schedule a professional inspection including heat exchanger check, burner cleaning, ignition testing, and static pressure measurement.
Duct sealing: If you’ve never had ductwork sealed, or if existing seals have failed, schedule professional duct sealing with mastic sealant.
Frequently Asked Questions About Fall HVAC Maintenance
When should I start fall HVAC maintenance in Kansas City?
September is the ideal starting point. Kansas City’s heating season typically begins in mid to late October, with the first sustained cold arriving in November. Starting maintenance in September gives you time to schedule professional services (duct cleaning, furnace tune-up) before HVAC companies enter their busy season. DIY steps like filter changes and CO detector checks take an afternoon and can be done anytime in September or October. Don’t wait until the first cold snap — that’s when everyone calls at once.
How often do air ducts need professional cleaning?
The NADCA recommends professional duct cleaning every 3 to 5 years. Homes with pets, smokers, recent renovations, or residents with allergies or asthma may need cleaning more frequently. If you notice visible dust blowing from registers, musty odors when the furnace runs, or increased dust accumulation on surfaces, schedule an inspection regardless of when the last cleaning occurred. Learn more about our duct cleaning process.
Can I do fall HVAC maintenance myself or do I need a professional?
Several steps are safe and effective as DIY projects: changing the furnace filter, testing and replacing CO detectors, programming the thermostat, opening all registers, and inspecting the exterior exhaust flue. Other steps require professional equipment and training: duct cleaning, duct sealing, furnace tune-up, heat exchanger inspection, and dryer vent cleaning. A practical approach is to handle the DIY steps yourself in September and schedule professional services for October — before the winter rush hits.
Does fall HVAC maintenance actually save money on heating bills?
ENERGY STAR reports heating and cooling accounts for 43 to 48% of home energy use. Clean filters, sealed ducts, clear registers, and a tuned furnace all reduce the energy your system needs to maintain temperature. Duct sealing alone addresses the 20 to 30% of conditioned air that ENERGY STAR estimates is lost through leaks. Combined, these steps won’t cut your bill in half, but they’ll prevent the unnecessary waste that inflates winter energy costs.
What happens if I skip fall HVAC maintenance?
The furnace will probably run. But it’ll run dirtier, less efficiently, and with a higher risk of midwinter failure. Dirty ducts recirculate months of accumulated debris. Clogged filters restrict airflow and strain the blower motor. Unsealed ducts waste heated air into unconditioned spaces. Dead CO detectors leave your family unprotected from a cracked heat exchanger. None of these problems announce themselves loudly. They just quietly cost you money, degrade your air quality, and increase the odds of an expensive emergency repair in January.
Should I close registers in unused rooms to save energy?
No. Closing registers increases static pressure inside the duct system, which forces the blower motor to work harder and worsens air leakage at duct joints. Your furnace is sized to heat the entire house. Closing registers doesn’t reduce fuel consumption — it redistributes pressure in ways that increase energy waste and wear on the blower. Open every register in the house and let the system operate as designed. If you want zone control, talk to an HVAC professional about a zoning system with dampers and multiple thermostats.
Prepare Your HVAC System Before Kansas City Winter Arrives
Nine steps. That’s the difference between a heating system that runs cleanly, efficiently, and safely all winter — and one that struggles through five months of cold with dirty ducts, clogged filters, and unknown CO risks. Kansas City winters don’t ease into anything. One week it’s 60 degrees, and the next your furnace runs nonstop through a single-digit cold snap. Fall HVAC maintenance gets your system ready before that switch flips.
Start with the DIY steps: fresh filter, open registers, programmed thermostat, tested CO detectors. Then schedule the professional work: duct cleaning, dryer vent cleaning, register replacement, and a furnace tune-up. Do it in September or October, before HVAC companies are booked solid with emergency calls. Every step on this list prevents a problem that costs more to fix than to prevent.
Duct Pros serves homeowners throughout the Kansas City metro, including Lee’s Summit, Overland Park, and surrounding communities. We specialize in air duct cleaning, dryer vent cleaning, and register replacement — three of the nine steps on this fall checklist. Call 816-377-1898 to schedule your fall maintenance services, or visit our services page to see everything we offer.